After you’ve familiarized yourself with the basic screenplay formatting elements and how to format them in Arc Studio Pro, we’ve collected some advanced formatting tips and tricks below. Continue reading to learn about:
- Formatting individual paragraphs
- Dual Dialogue
- Automatic (CONT'D)
- Customizing your script writing flow
- Adding act breaks
- Customizing script elements
- Creating new script elements
- Scene numbers
- Dialogue Numbers
Formatting individual paragraphs
To adjust the formatting of an individual paragraph, click the element icon to the left of the paragraph you wish to adjust and select “Formatting”:
Or access the formatting menu by selecting the paragraph you want to adjust and using the keyboard shortcut Cmd + Opt + F (Ctrl + Alt + F on Windows):
Once the formatting menu is open, you can adjust the paragraph margins, alignment, and the top spacing (also set it to a page break).
Dual Dialogue
Put the cursor on the first of the two Character elements you wish to put in Dual Dialogue. Open the element menu by clicking clicking the element icon in the left margin and select “Make Dual” or use the keyboard shortcut Cmd + Opt + U (Ctrl + Alt + U on Windows).
To break the dual dialogue, select the character element. Then click the dual dialogue speech bubbles and select “Break Dual,” or use the keyboard shortcut again.
Automatic (CONT'D)
We don’t enable automatic dialogue (CONT'D) by default. If you prefer to have (CONT'D) markers added automatically, you can do so in the settings menu.
Click the gear icon and select ‘All Settings’ (or use the keyboard shortcut Cmd + ,)
Select ‘Page Layout’ on the left and change ‘Automatically mark dialogue as (CONT’D)’ to On
Customizing your script writing flow
In the Settings menu you can set which elements automatically follow an Action or Dialogue element when hitting Return.
- Access the Settings menu with the keyboard short cut
Cmd + ,or by clicking the Settings ‘gear icon’ and then clicking ‘All settings’ - Click on ‘Writing Preferences’ on the left.
- Under ‘Script Flow’ use the dropdown menus to customize what automatically follows an Action element and a Dialogue element when you hit
Return.


You can also customize what follows every other element by clicking the element listed in the left under ‘Element settings’ and using the dropdown menu next to ‘Next Element’

Adding act breaks
To add the option of including act breaks, change the elements template to ‘Television screenplay’
- Access the Settings menu with the keyboard short cut
⌘ ,or by clicking the Settings ‘gear icon’ and then clicking ‘All settings’ - Select the ‘Page Layout’ section on the left.
- In the ‘Elements template’ dropdown menu, choose ‘Television screenplay’

Customizing script elements
You can customize your script elements or add new script elements in the Settings menu.
- Access the Settings menu with the keyboard short cut
⌘ ,or by clicking the Settings ‘gear icon’ and then clicking ‘All settings’ - Choose the element you’d like to adjust in the menu on the left under ‘Element formatting’
- Adjust the formatting for the element as you desire.

Creating new script elements
You can add new custom script elements in the Settings menu.
- Access the Settings menu with the keyboard short cut
⌘ ,or by clicking the Settings ‘gear icon’ and then clicking ‘All settings’ - At the bottom of the ‘Element formatting’ list on the left, click ‘+ Add Element’
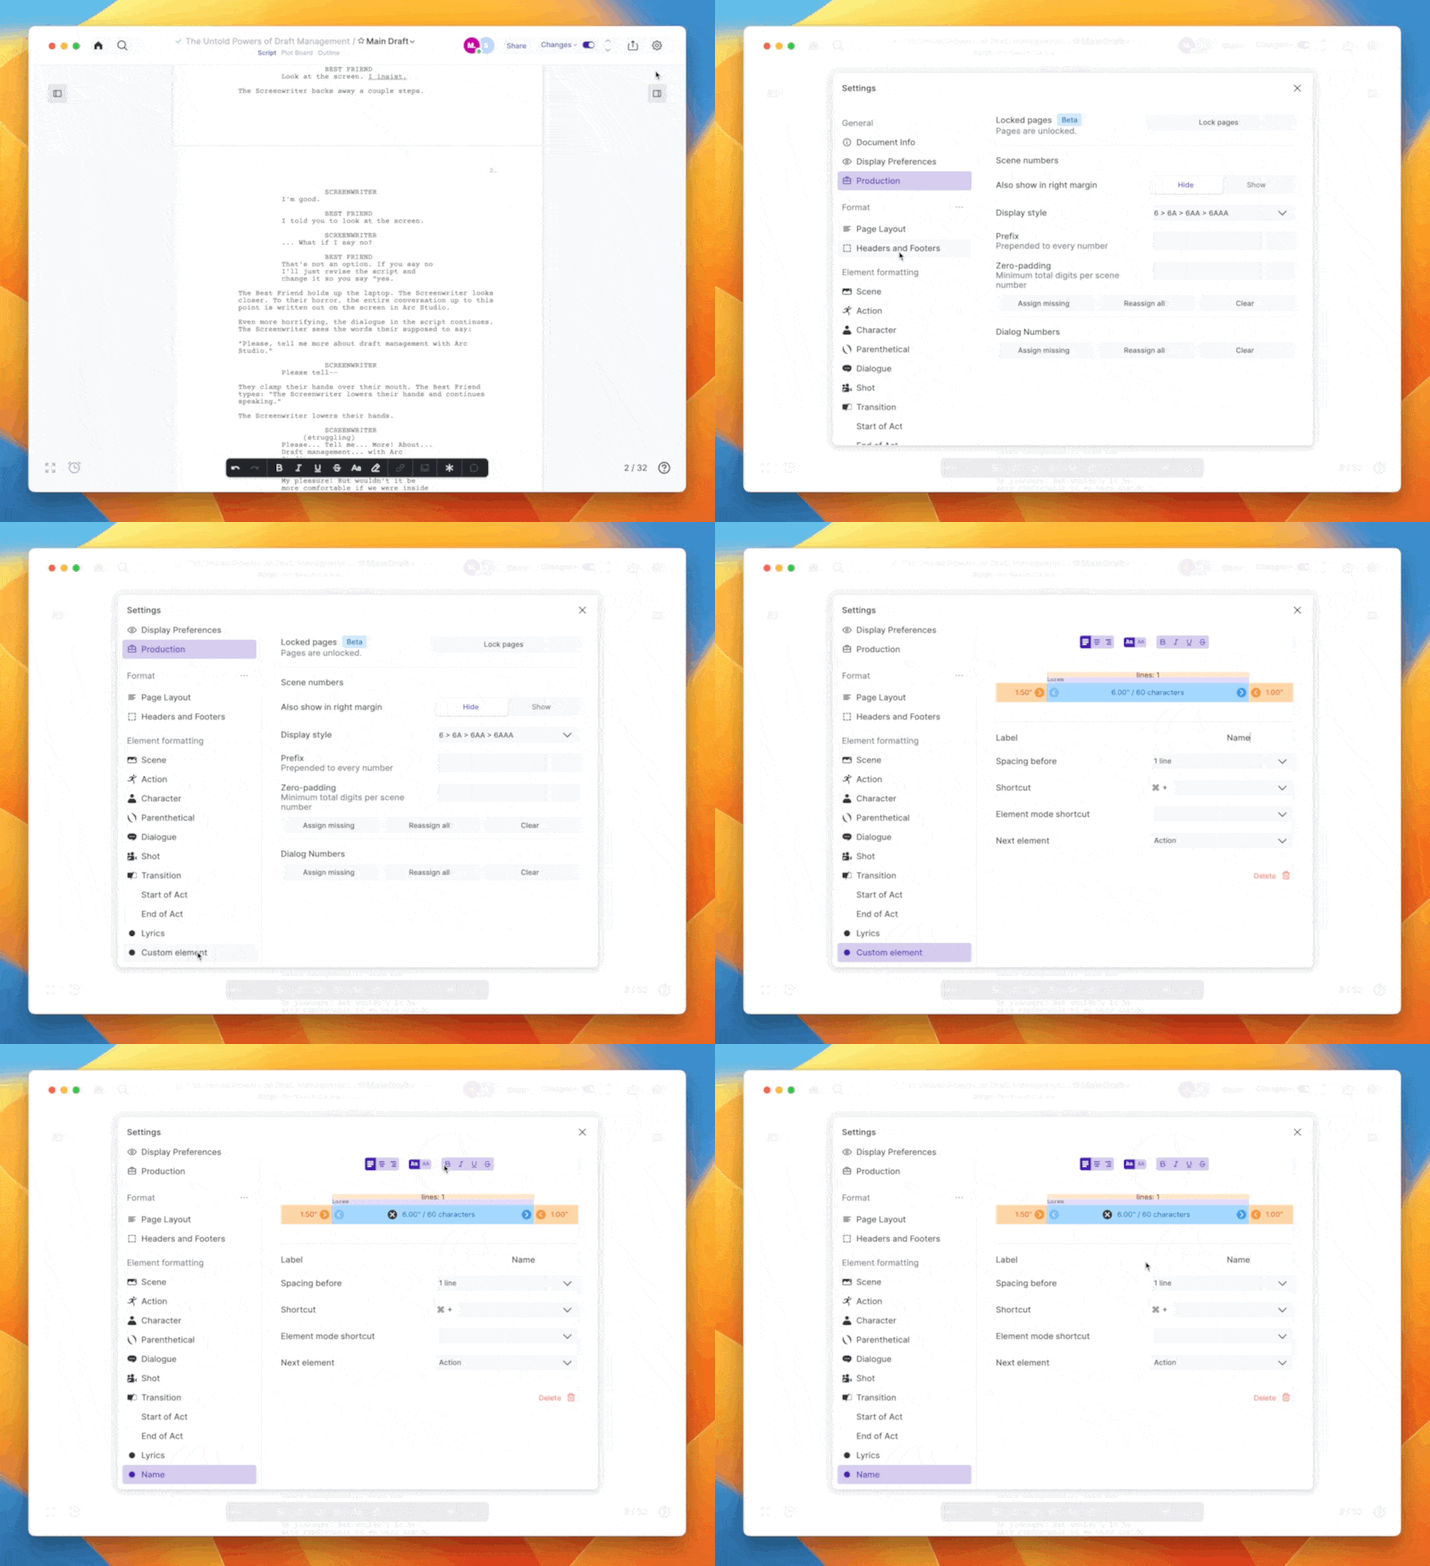
- This will create an element called ‘Custom element’ select it.
- Name your custom element in the ‘Label’ section and select your desired attributes.

Scene numbers
You can add and remove scene numbers in the ‘Production’ section of the Settings menu.
- Access the Settings menu with the keyboard short cut
⌘ ,or by clicking the Settings ‘gear icon’ and then clicking ‘All settings’ - Select the ‘Production’ tab on the left.
- Find the ‘Scene Numbers’ section
- Choose how you’d like the the scene numbers to appear.
- If you’d like to number only the scenes that are not currently numbered, select ‘Assign missing.’ To reassign every scene, including those that currently are numbered, select ‘Reassign all’
- To remove the scene numbers, select ‘Clear’
See also: How Do I Manually Change Scene Numbers?
Dialogue Numbers
You can add and remove dialogue numbers in the ‘Production’ section of the Settings menu.
- Access the Settings menu with the keyboard short cut
⌘ ,or by clicking the Settings ‘gear icon’ and then clicking ‘All settings’ - Select the ‘Production’ tab on the left.
- Find the ‘Dialogue Numbers’ section
- If you’d like to number only the dialogues that are not currently numbered, select ‘Assign missing.’ To reassign every dialogue, including those that currently are numbered, select ‘Reassign all’
- To remove the Dialogue numbers, select ‘Clear’
