Arc Studio makes it easy to manage drafts and revisions, track script changes, and recover writing from older drafts that you deleted but now want back after realizing how brilliant it was.
Everything you write is automatically saved online, instantly retrievable, and backed up locally to wherever you choose. If you forgot to do something—like track changes in the draft you’ve been working on for hours—Arc Studio lets you hop in a time machine and rewrite history so you did remember. (Because you’re great and you’d never forget a thing like that.)
First, we’ll take a look at traditional draft management and show off how Arc Studio does it better. Then we’ll dive into the details and show you how to get started. (Feel free to jump ahead to the instructional part of the guide.)
The traditional (horrible) way of draft management
If you use traditional screenwriting software, you get real familiar with the ‘Save as’ button as you make new drafts. Eventually you end up with something like this:

So what’s the problem? To start with every draft of your script is a separate file. If you’re on the Yellow Production Draft and there’s some dialogue from the Writer’s Draft you want to put back in, you’d have to go find that file on your computer, open it, read through it to find the part you wanted, and copy and paste it into the new draft. Of course, you probably don’t remember exactly which draft it was in, so you end up searching through multiple script files to find it and now you have a bunch of identical-looking windows open. (Best of luck to you and the script coordinator on your show if you start working again in the wrong file.)
Draft management with Arc Studio
There is a better way, and it’s called Arc Studio. With us, draft management looks like this:

All your drafts are right there next to your script in the order that you made them, all accessible with a single click, and you don’t need to save anything while you’re writing. You’ll probably ignore that and try to save your script anyway because you’re haunted by past experiences of losing unsaved work, so if you hit ‘Cmd + S’ on instinct you’ll get this reassuring reminder:

Once you’re ready to file an official draft, like the ‘Writer’s Draft’ or ‘Green Production Draft,’ you take a Snapshot of your script. We call it a snapshot because it permanently captures the state of your document at the time it’s made. It’s a milestone in your project that you want to keep around for future reference. When you give a snapshot a color, we call it a Revision.

Arc Studio also creates Autosaves. These are snapshots automatically made every time you stop writing for ten minutes. They’re all accessible in your ‘Full history,’ so if you forgot to take a snapshot you can access the Autosaves and file them as revisions.
Now let’s say you’re looking for that dialogue that you cut in an earlier draft but now want back. With Arc Studio you can click through all your previous drafts of the script and automatically highlight all the changes that have been made since that draft. The dialogue is easy to find because things you’ve added since that draft are highlighted in green, and things you’ve deleted (like that dialogue we’re looking for) are highlighted in red:

With a click, that dialogue from your old script is incorporated back into your current draft:

Arc Studio also helps you avoid that age-old problem of accidentally making your new changes in an old draft. The color of the page changes from white to off-white ‘recycled paper’ when you click on an old draft, and then back to white when you click on the current draft.
Current Draft

Old Draft

It’s an easy way to make sure you’re always working with the most recent draft.
What if you want to try something different? Maybe you’re not satisfied with your script’s current opening. Instead of creating a whole new file to keep track of, you can create an alternate draft. If you’re working with collaborators, this alternate draft stays hidden until you want to share it.

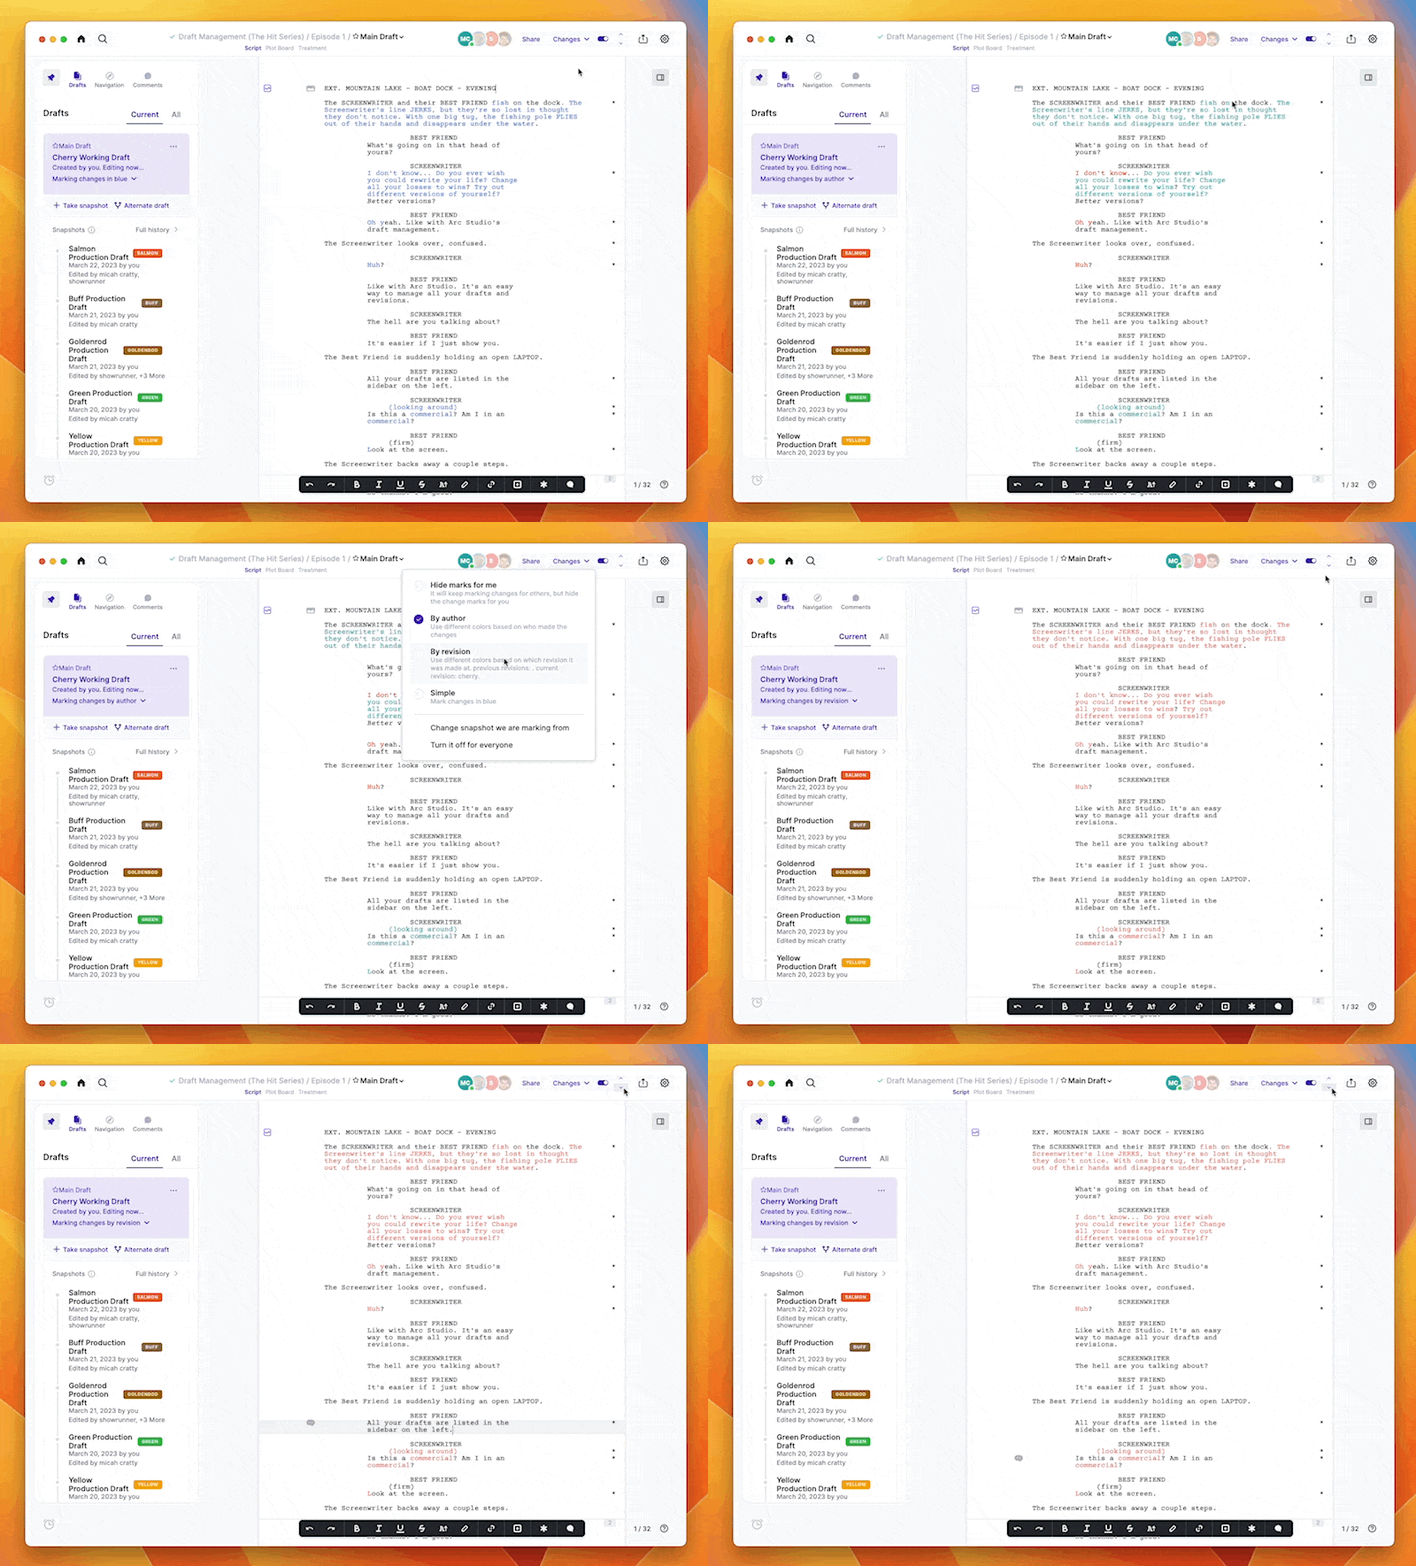
Uh-oh, were you supposed to be tracking changes, but just noticed the right margin is as star-free as a cloudy night? Not to worry. In the background, Arc Studio is keeping track of all the changes you make. You can select which draft you want to track changes from and voila, the skies clear and the stars appear.

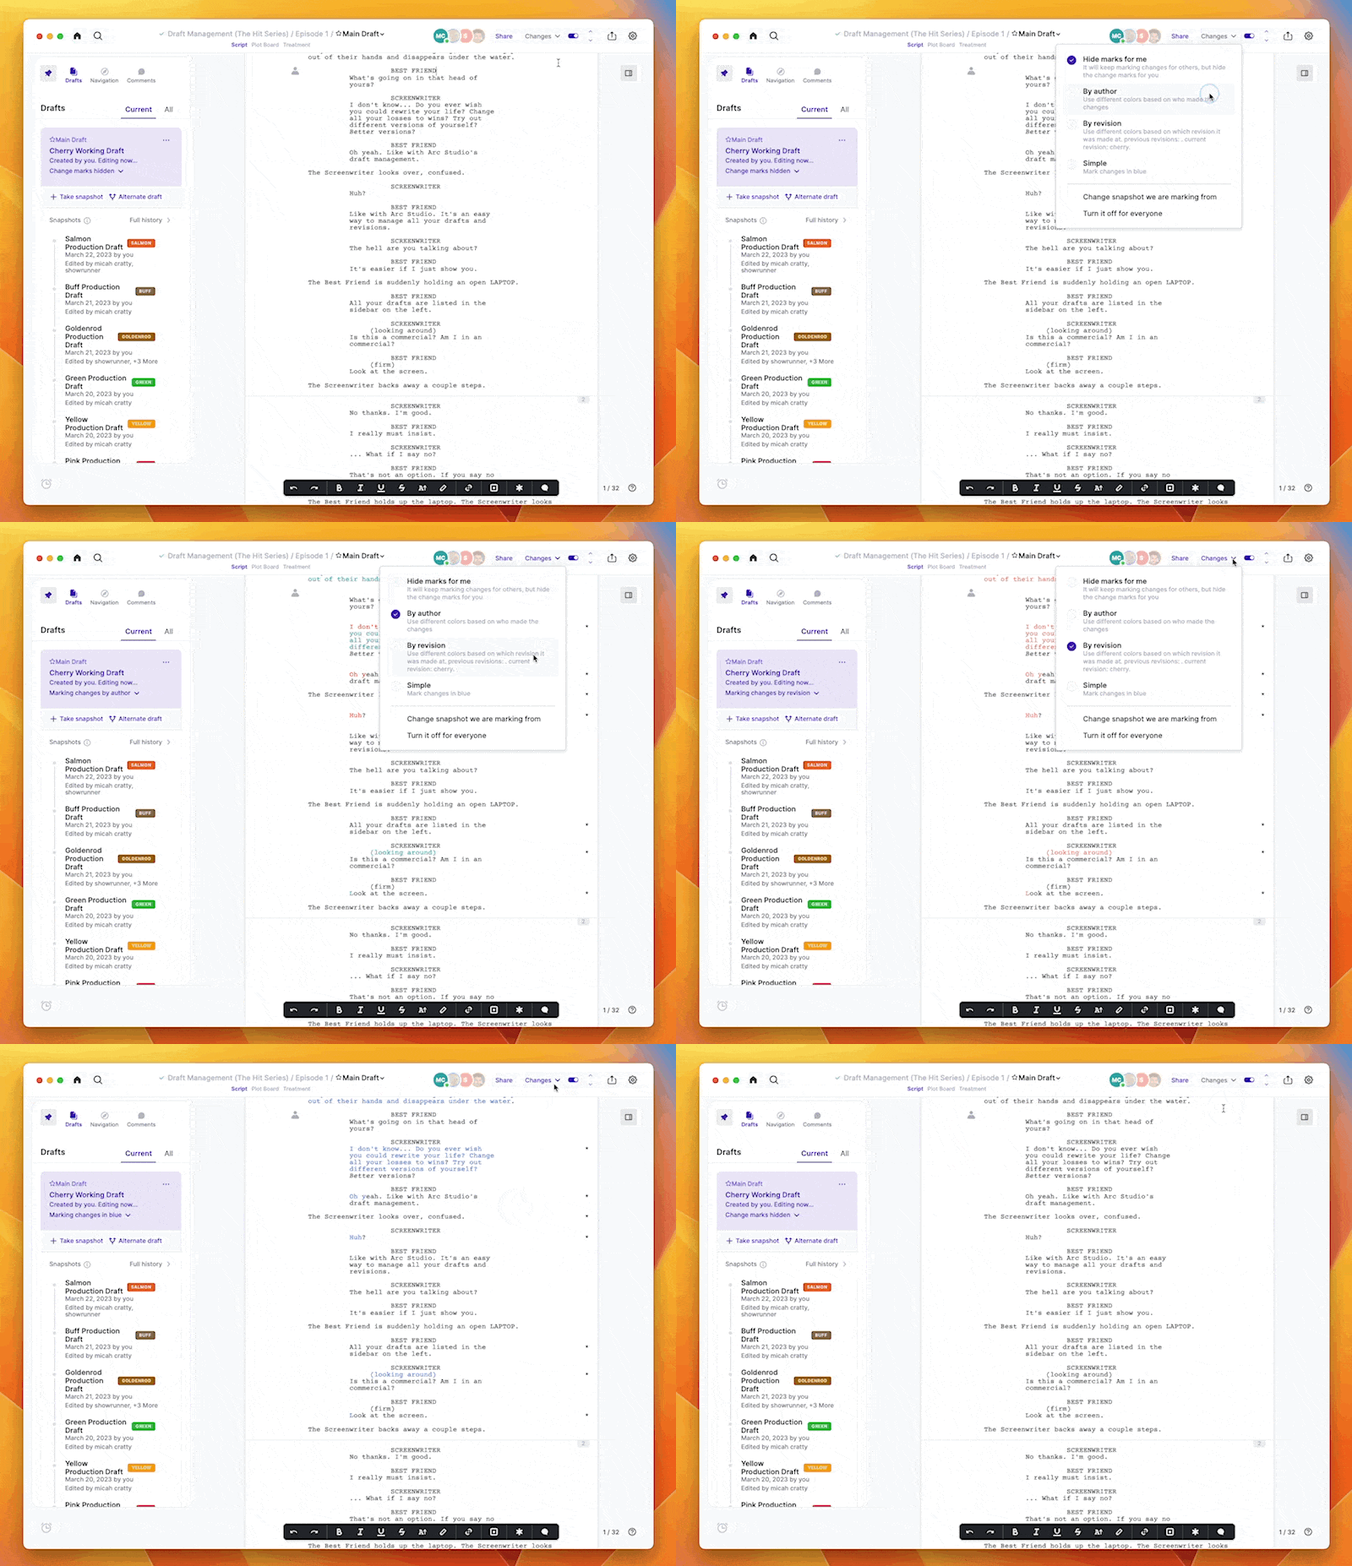
A star can only tell you that something changed. It can’t tell you when it changed or who made the change. With Arc Studio you can highlight changes by revision or by author. The changes from each color revision will be in the corresponding color. If you’re working with collaborators, every writer’s changes will be a unique (and customizable) color.
You can also quickly jump between your changes instead of having to scroll through every page checking to see if there are stars.
The Details
Now that you’ve seen what Arc Studio can do with Draft Management, let’s look at how it’s done.
Drafts sidebar
We’ll start with a closer look at the Drafts sidebar. This where all your drafts and colored revisions live. At the top you’ll see the draft you’re currently working on listed as ‘Main draft.’ If you created it, it’ll say ‘Created by you.’ If you’ve selected it, it’ll say ‘Editing now…’ You can rename this draft by clicking the more options icon ‘…’ to the left of ‘Main Draft’ and selecting ‘Rename.’
Below the Main Draft you’ll see all your other drafts. You can see the name of each draft, the color of the revision, when that it was filed, who filed it, and even which writers made changes to it if you’re in a writers’ room or writing with a partner.
Full history
Click on ‘Full history’ to see the complete timeline of all your drafts, including the autosaved versions, complete with the date and time that they were created.

Filing a draft with the Snapshot tool
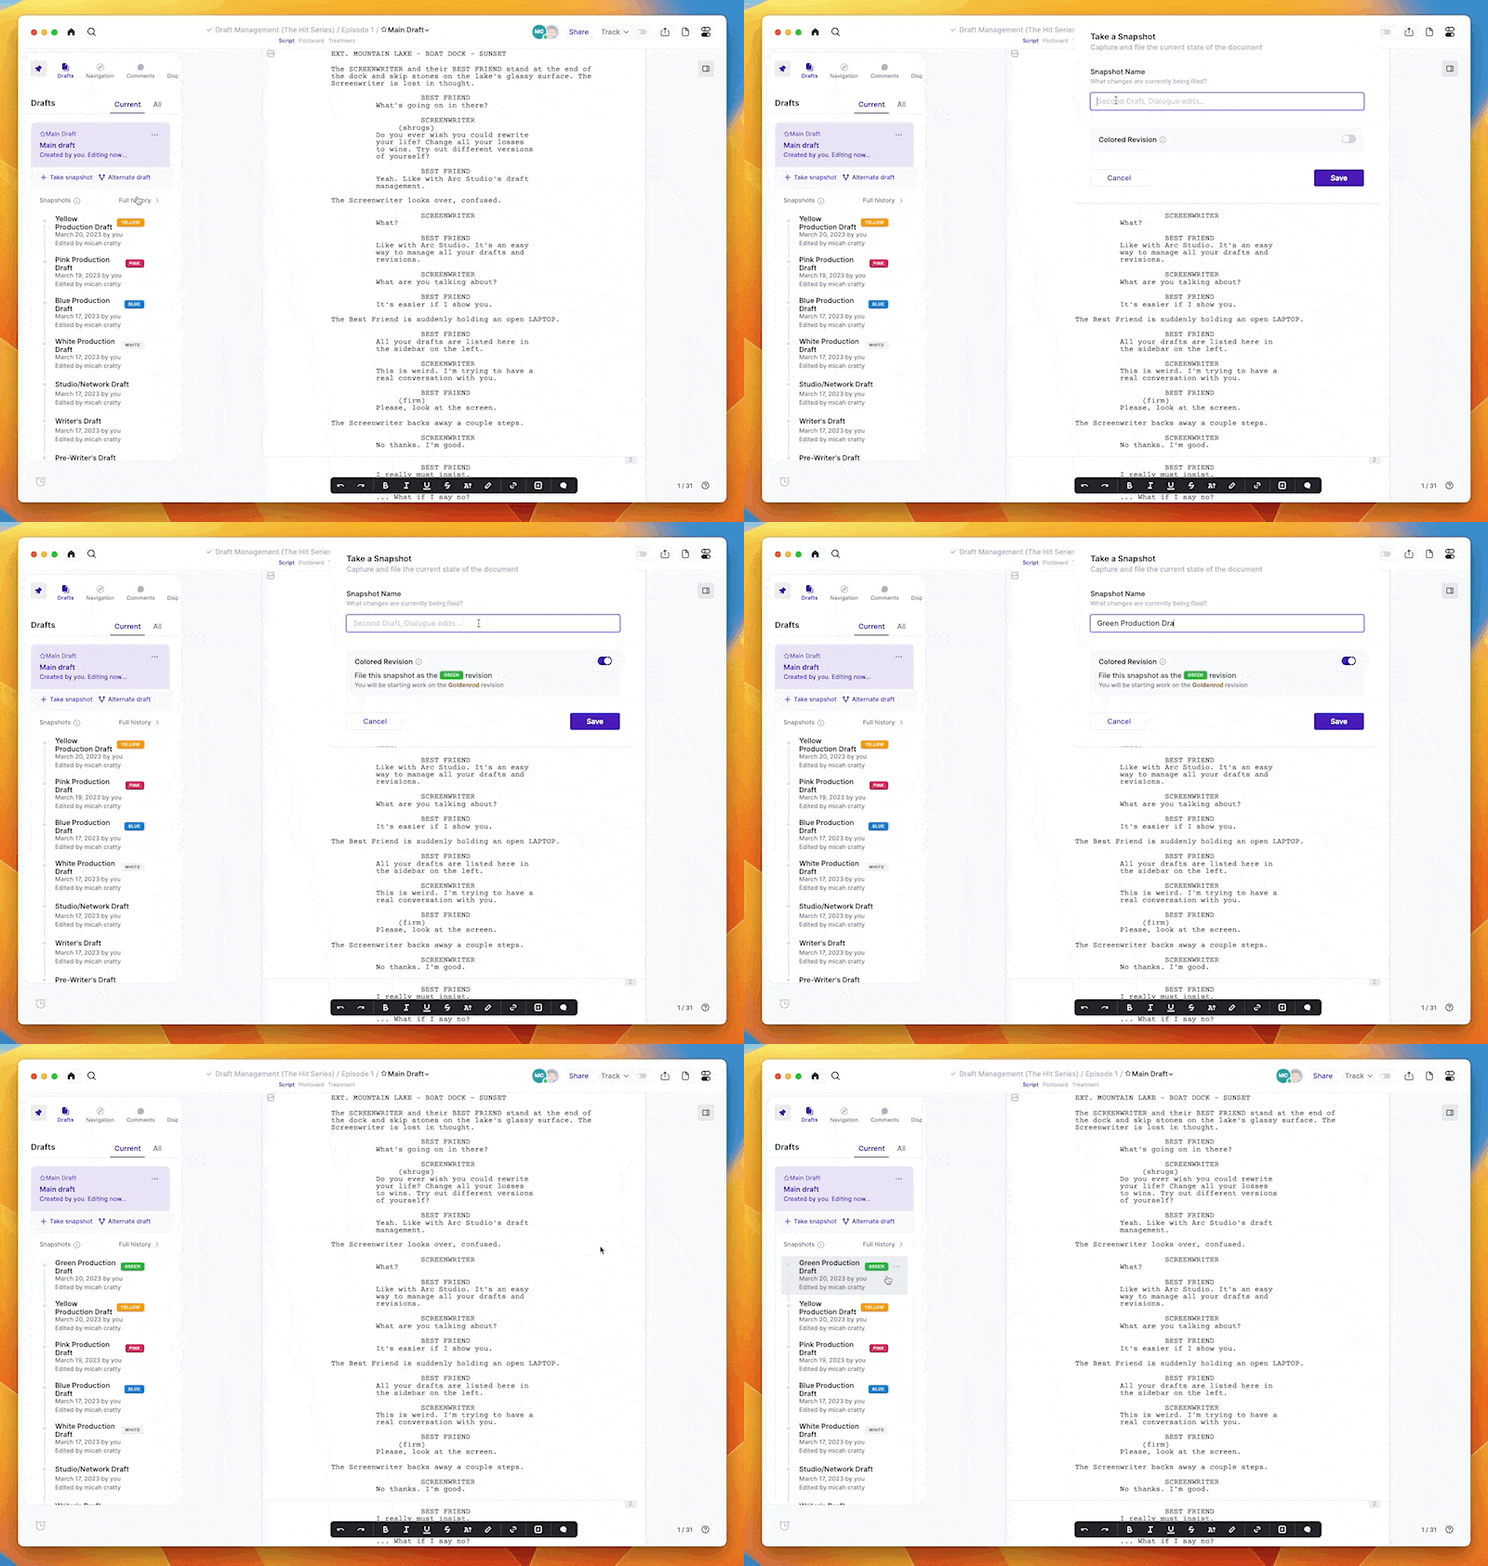
Once you’re ready file a draft of your script, open the ‘Drafts’ sidebar and click ‘+ Take snapshot’ or use the keyboard shortcut ‘Shift + Cmd + S.’ Then type in the name of the draft, like ‘Green Production Draft.’
Click ‘Save’ and you’ll see the draft listed in the Drafts sidebar, along with the date it was created, who made it, and who made the edits in that draft. This snapshot is a permanent record of the script at the moment it was taken.
Revision colors
If you’re in production, you can give the snapshot a color to make it a Revision. The first time you give a snapshot a color, it’ll be the White Revision. The next time you make a color revision, it’ll be Blue, then Pink, etc.
Changing the revision color and name
The color and name of the revision can be changed manually if you use a different color order. Right-click on the snapshot in the sidebar and select ‘Edit name or revision color.’ Click on the circle to the right of ‘Change revision color’ to select the color you want and change the name. Hit ‘Save’ when you’re done.

Removing Revisions
If you made a snapshot or Revision that you no longer want, you can right-click on the draft and select ‘Remove name and revision color.’ This will make that revision an autosave accessible in the ‘Full history’ menu.

Turning an Autosave into a revision
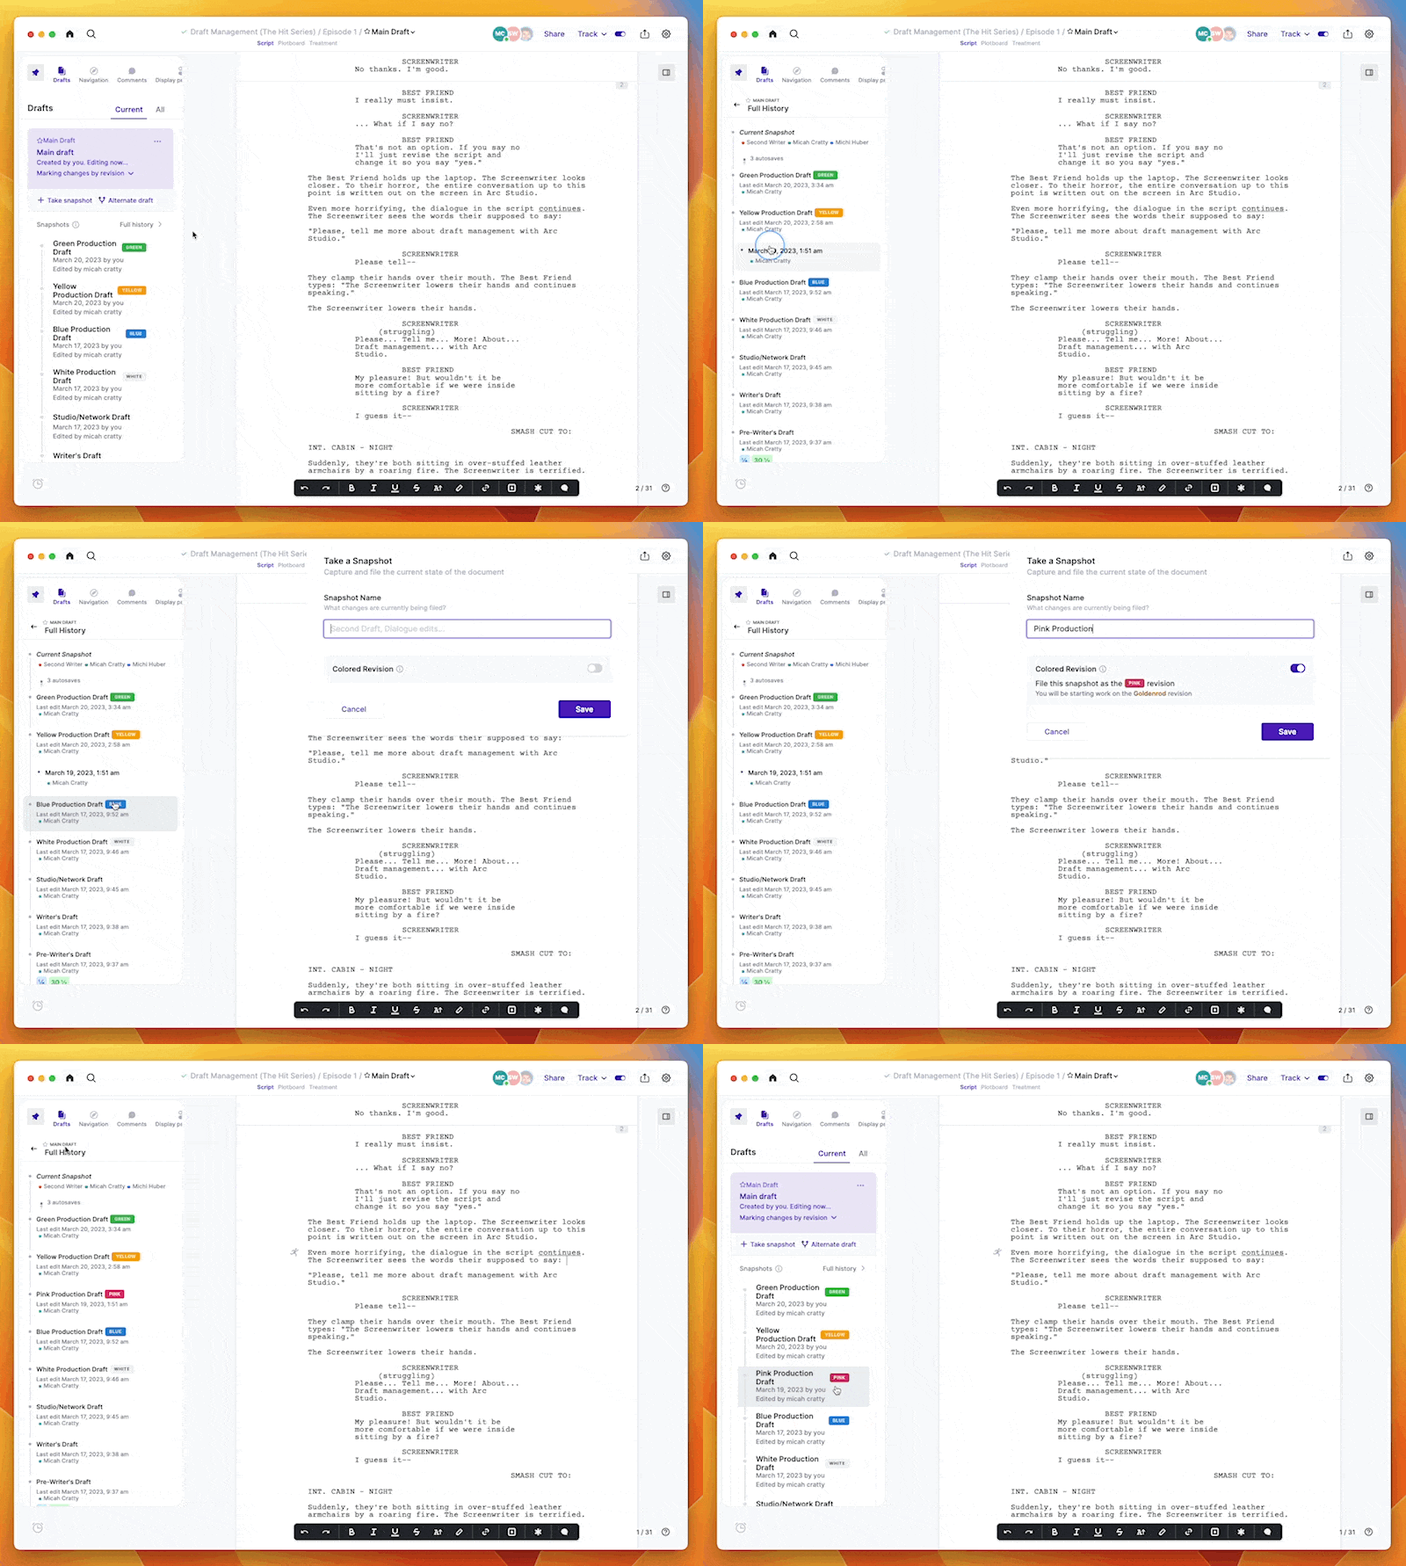
If you forgot to file a revision, you can access the autosaved version of the script and turn it into a snapshot. Click on ‘Full history’ in the Drafts sidebar, then right click on the Autosave and select ‘Turn into snapshot.’ Toggle on ‘Colored revision,’ give it a name, and click ‘Save.”
Tracking changes
To start tracking changes, toggle on the switch in the top right next to ‘Changes’

Forgot to track changes?
If you suddenly realize you forgot to track the changes in the draft you’ve been working on, you can open the tracking menu in the top right and choose an earlier snapshot to track from.

Jumping between changes
If you have a lot of changes in your script, it can be a pain to scroll through each page hunting for stars. Arc Studio makes this easier by letting you jump through all the changes by clicking the up and down arrows next to ‘Changes’ in the top bar.

Hiding changes
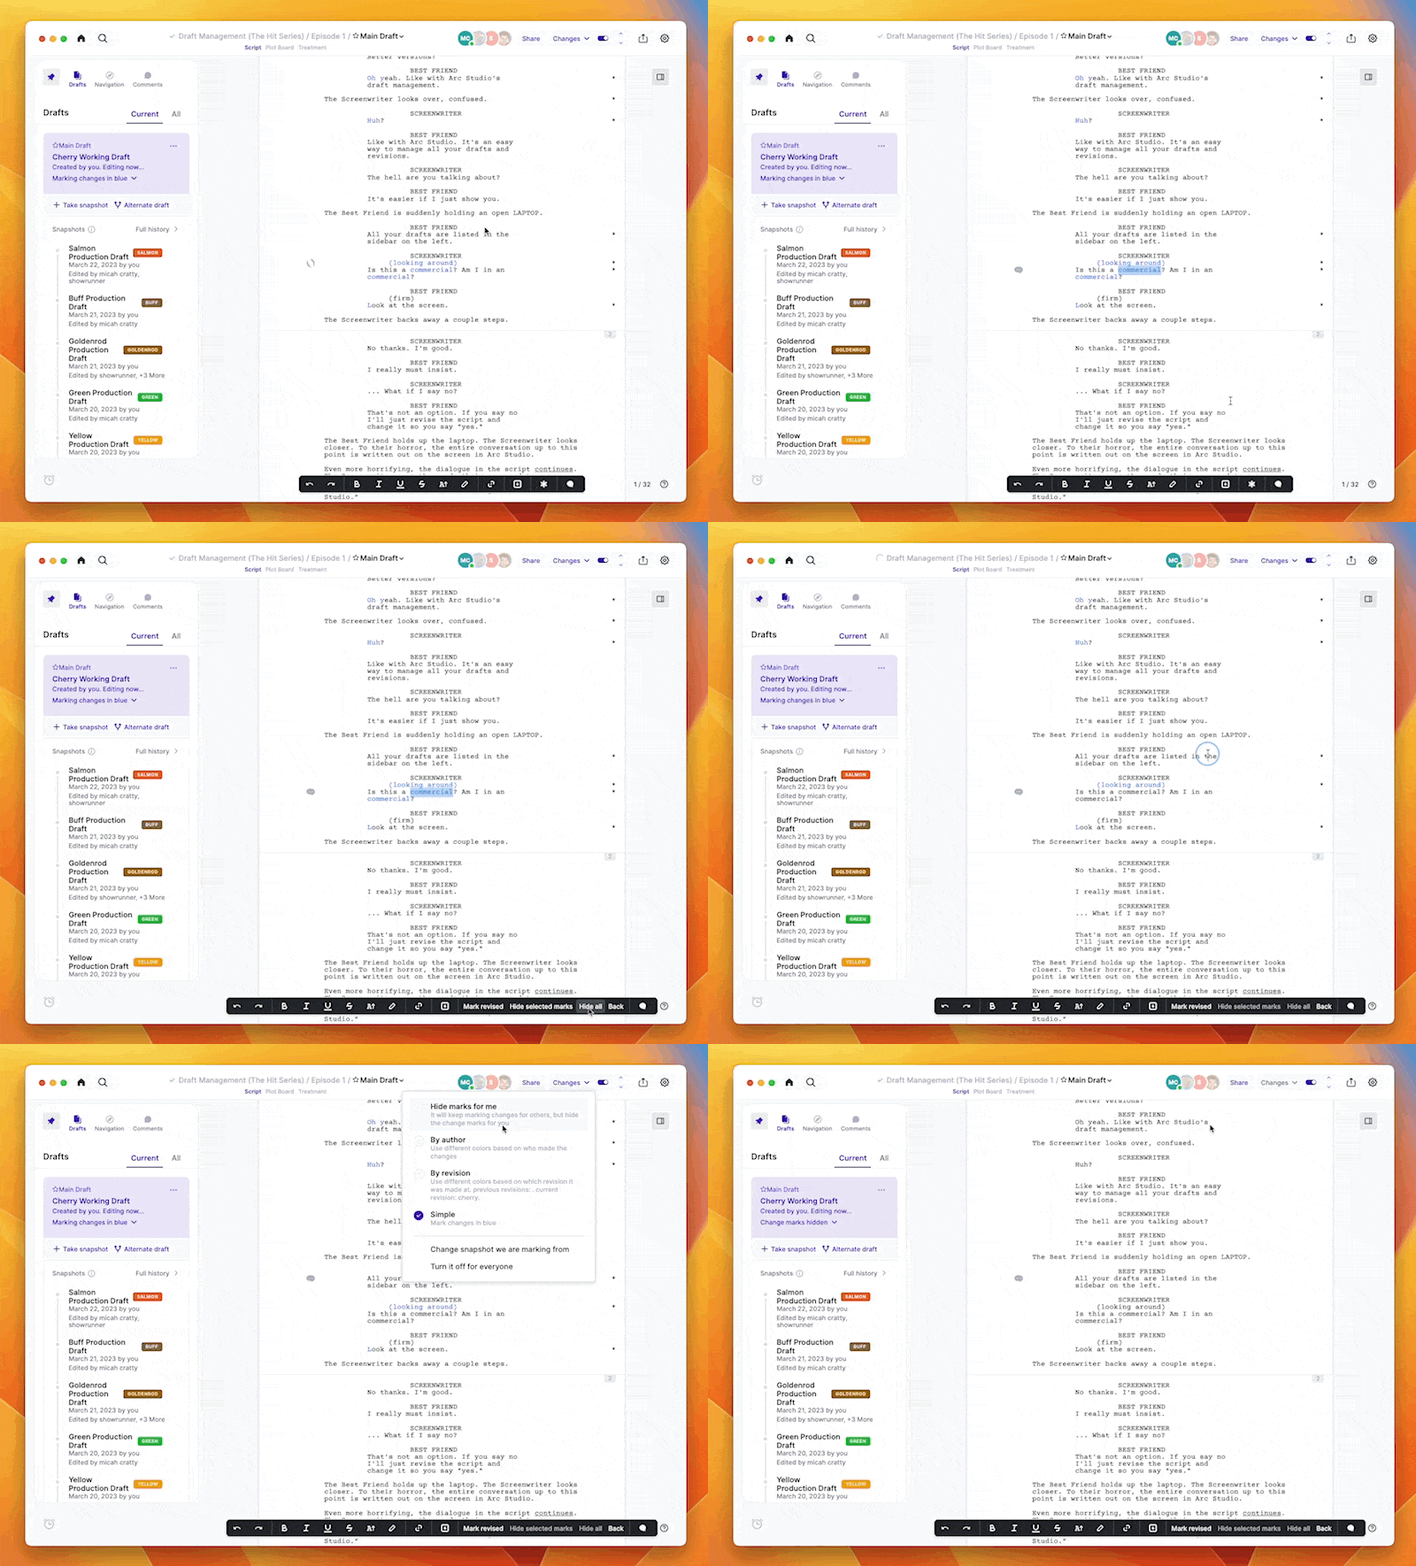
You can hide small changes through accessing the Revision marks menu in the formatting bar at the bottom of the page. Start by clicking the star icon.
To hide one change, highlight that change and select ‘Hide selected marks.’ To hide all the changes in the paragraph, select ‘Hide all.’ (Just to reiterate, ‘Hide all’ hides all the changes in the paragraph.) To hide all the changes in the entire document, click on ‘Changes’ in the top bar and select ‘Hide marks for me.’
Turning off change tracking
To stop tracking changes entirely, click ‘Changes’ and select ‘Turn it off for everyone’

Highlight modes
Change marks are set up at the draft level, so all the collaborators on a script will have the same changes highlighted. That said, each writer can control how their changes are displayed. They can see:
- Who made the changes by choosing to highlight ‘By author.’ Each author’s changes will be a unique, and customizable color.
- In which revision the changes were made by choosing to highlight ‘By revision.’ The changes will be color coded by the Revision they were made in. (Blue text for the Blue Revision, pink text for the Pink Revision, etc.)
- All the changes in blue text by choosing ‘Simple highlights.’
If you don’t want to see any change information, select ‘Hide marks for me.’
If a writer doesn’t like the color for their revisions, it can be changed by clicking ‘Share’ and then clicking on the color circle next to their name:

Browsing your Draft history
When you open an old snapshot, you will see your script as it was at the time the snapshot was created. Arc Studio gives you complete control on how you view the changes made since that draft and in that draft. You can view them by Type (additions and deletions), by Author, and by Revision Color.
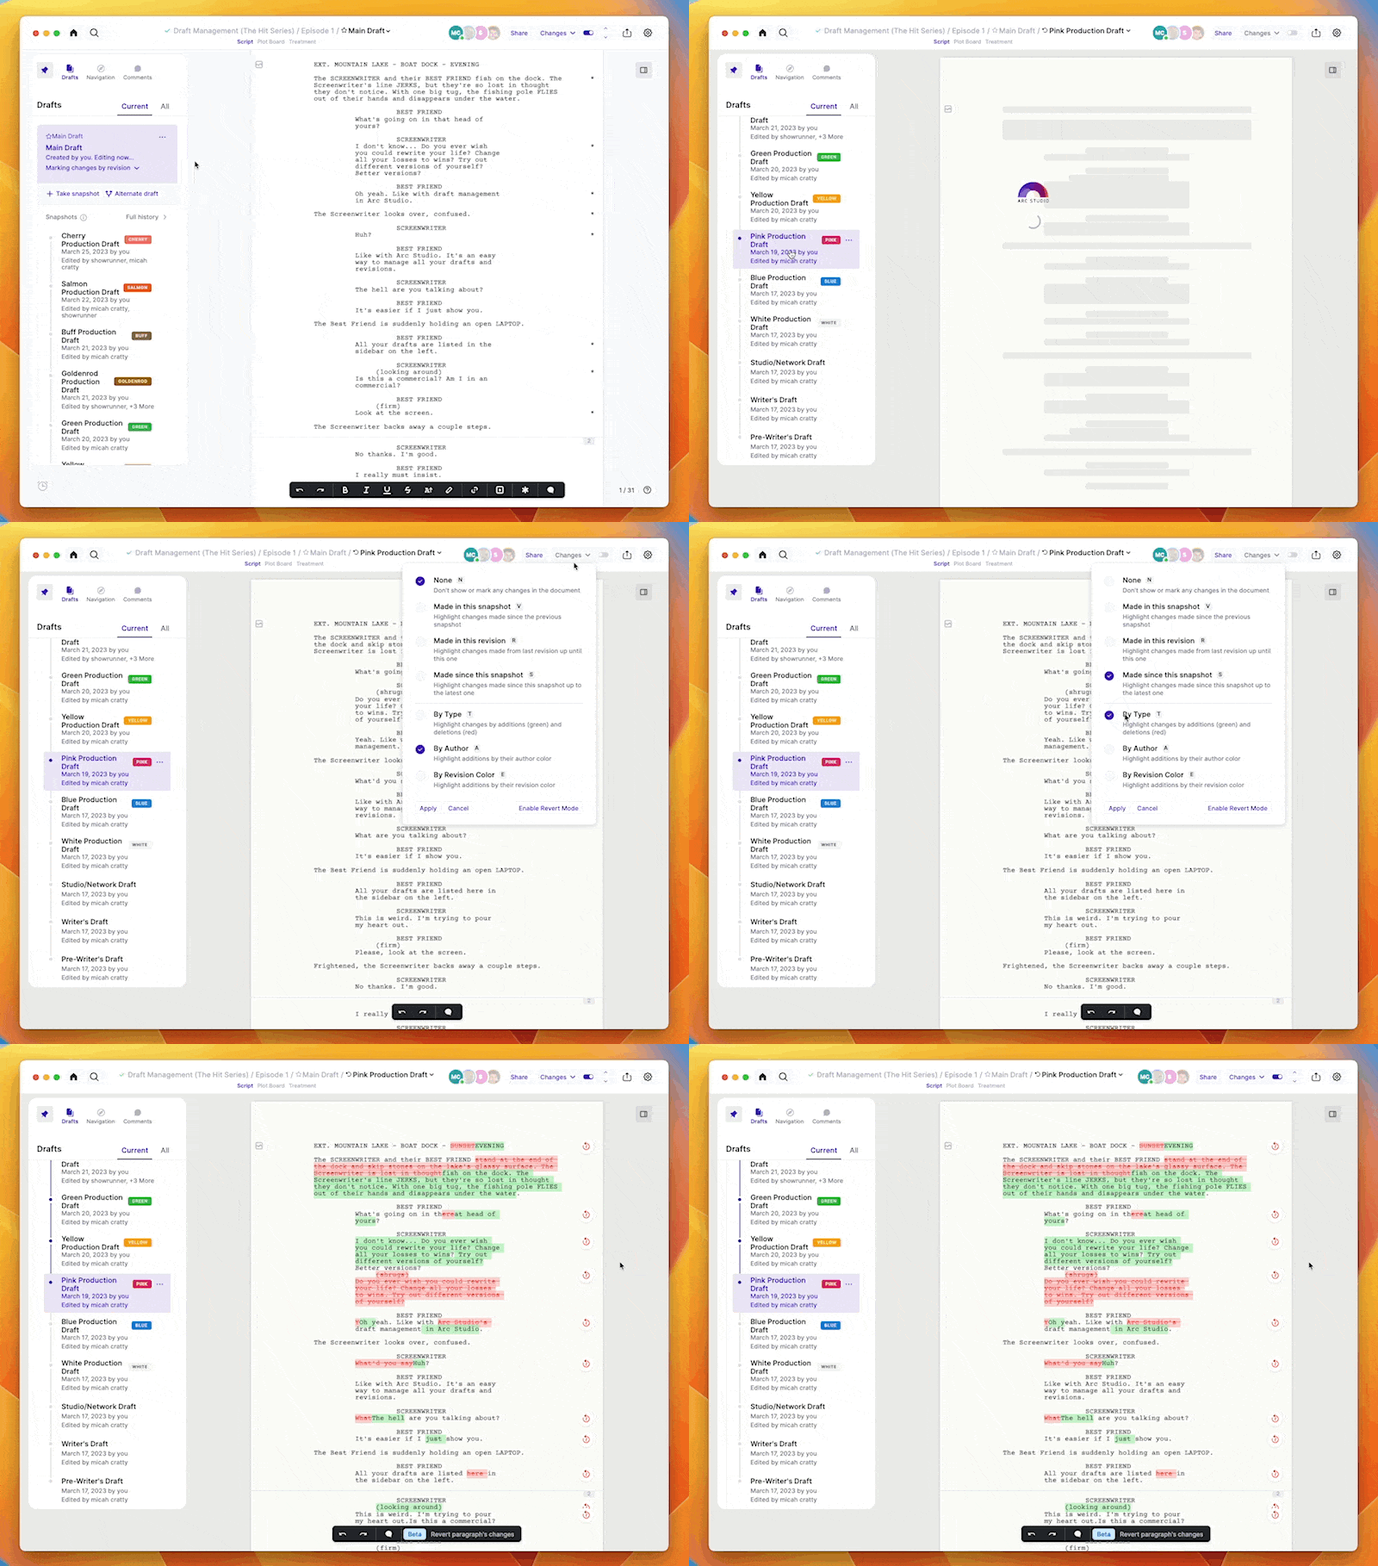
After navigating to an old snapshot, click on ‘Changes’ and mark all changes ‘Made since this snapshot’ to see all the changes between when this snapshot was created and the most recent version of the script. If you additionally select ‘By Type’ things that have been added since will be highlighted in green, and things that have been deleted since will be highlighted in red.
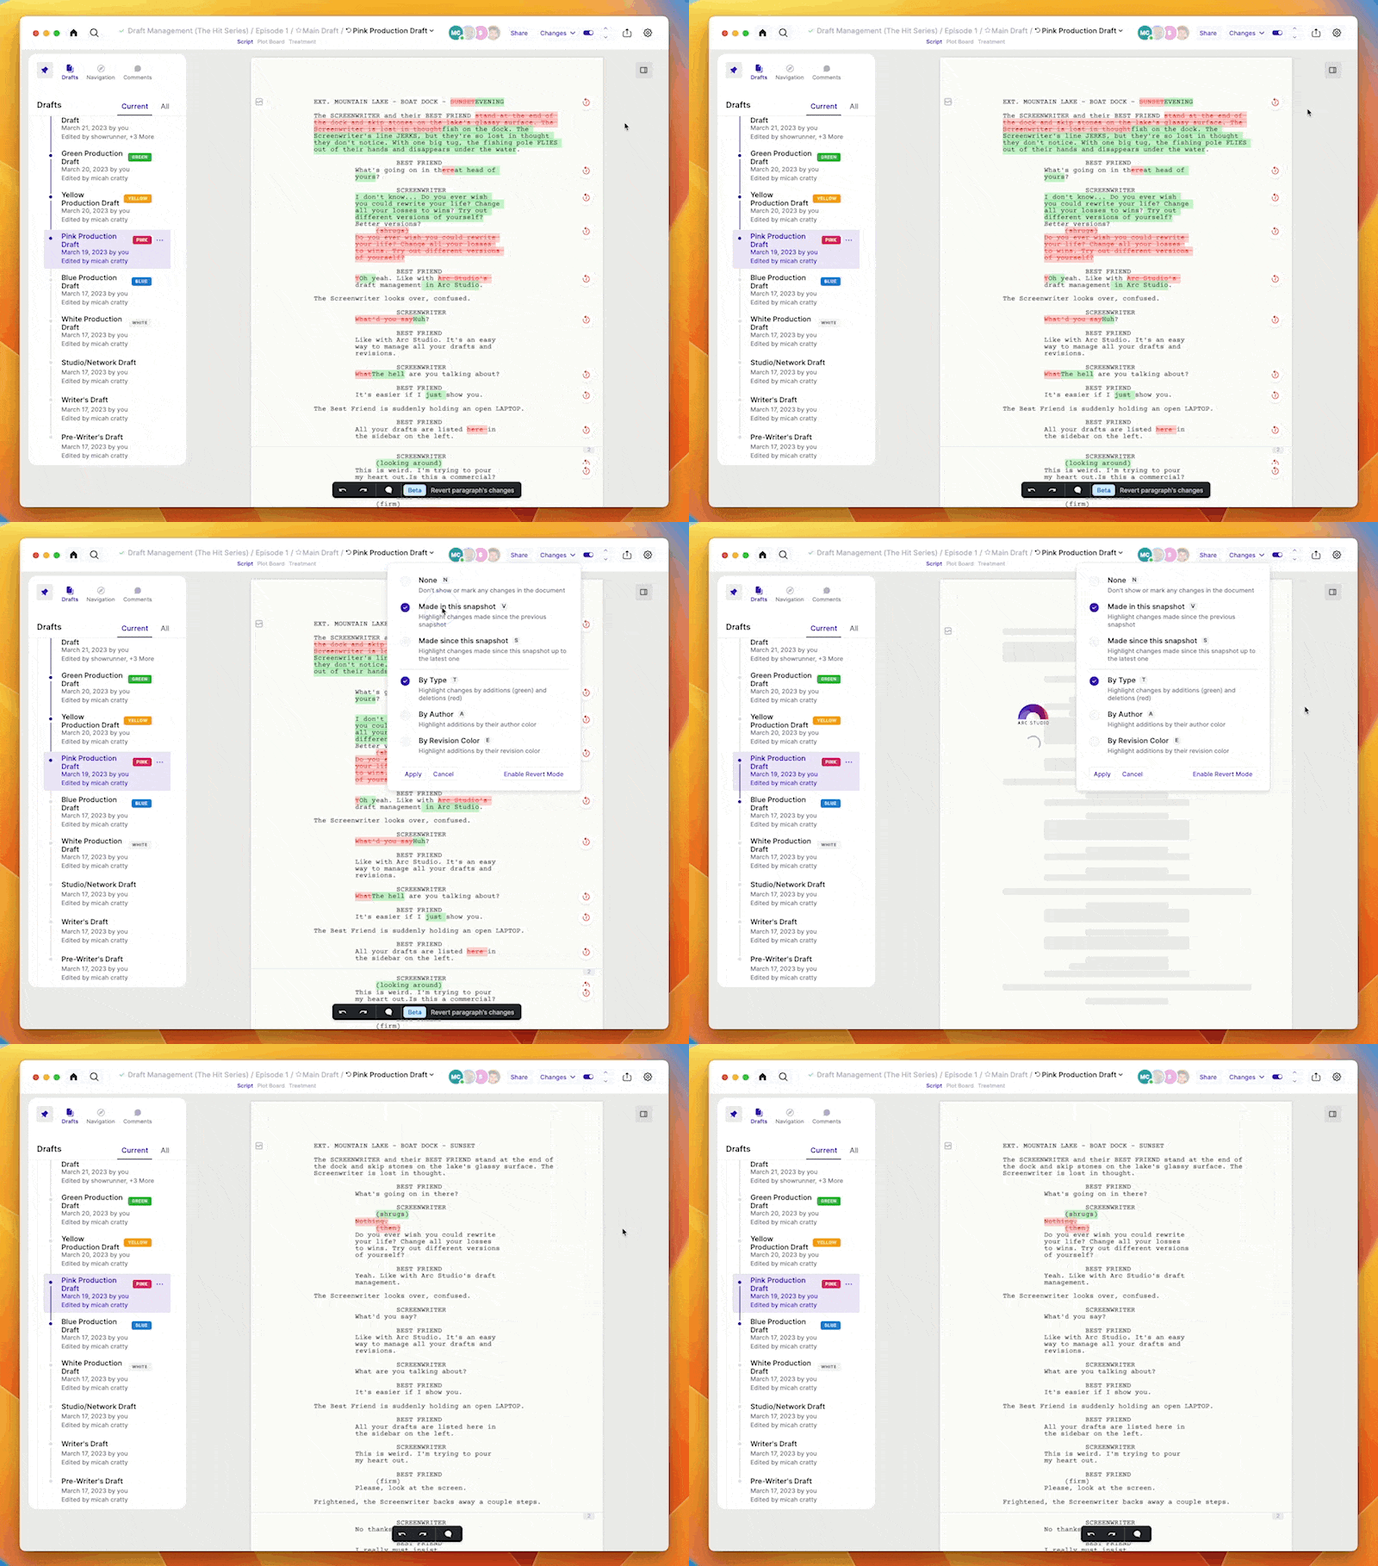
You can also see the changes you made in that snapshot. Mark all changes ‘Made in this snapshot’ to see what was different between this snapshot and the one right before it.
If the snapshot you’re looking at is a Color Revision, you can also mark all changes ‘Made in this revision’ to see everything that’s changed between this Revision and the preceding Revision, ignoring any intermediate non-color revision snapshots you made in between.
Revert mode
Let’s take it a step beyond just seeing what changed. What if you want to undo one of those changes? For instance you cut a scene but changed your mind and want it back.
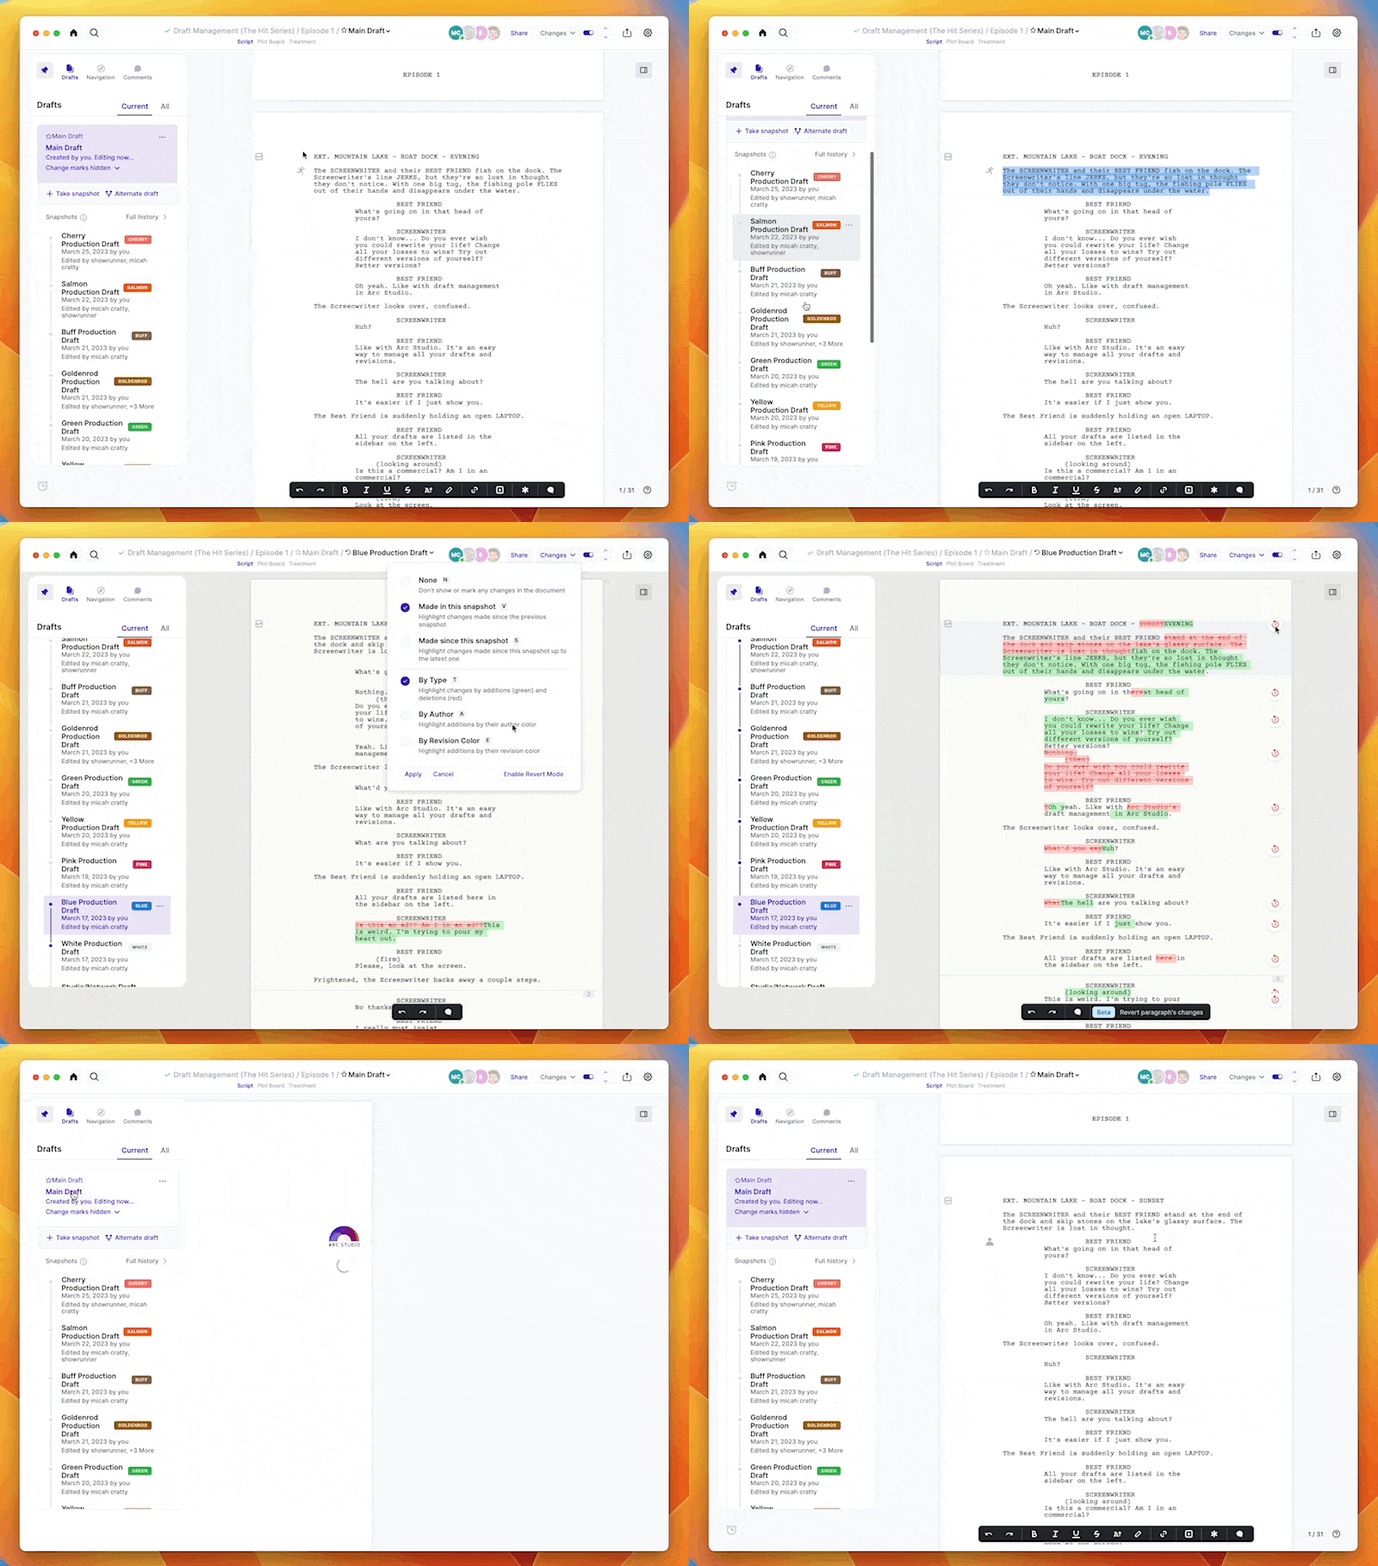
In the Drafts sidebar, select the draft or revision where the scene was before you cut it. Then ‘Enable Revert Mode.’ Everything you’ve added since this draft will be green, and everything you’ve deleted will be red. (This is the same as marking all changes ‘Made since this snapshot’ ‘By Type.’)
Find the ‘undo’ icon in the right margin next to the part of the script you want to bring back and click it. Then click ‘Sure?’ if you are certain you want to revert it into the current version of your script.
Alternate Drafts
When writing we often think of different ways sections of our script can go. Maybe you’ve thought of a slight variation on the opening or a completely different version of the ending, but you want to experiment with it before you put it in the main draft.
Instead of creating a new file that you have to keep track of, you can simply click ‘Alternate draft’ and then give it a description like ‘Alternate opening and ending.’ If you want the changes to be tracked, click ‘Start marking changes.’ Then click ‘Create.’
This is now a private alternate draft. Your collaborators can’t see it, so you have the freedom to try something wild. If you want your collaborators to see it, you can click ‘Unhide’ in the sidebar.

