
Arc Studio has integrated a digital whiteboard, called the Plot Board, into its screenwriting software. The Plot Board allows you to craft your story structure and then have all your beats visible in the same window as your script when you write your scenes.
TV writers can also outline an entire season of episodes and automatically convert each episode into its own script file with all the beats included. (We’ll get into the details of the season features in another article.)
For this guide we’ll focus on breaking a single story—whether it be a TV episode, pilot or feature film—and turning it into a script.
- Get to know the Plot Board
- Get to know the Outline view
- How the Plot Board and Outline help you write your script
- How to use the Plot Board
- Starting a Plot Board
- Acts and beats
- Story Elements
- Beat Inbox
- Arc view
- Outline
- Reviewing and editing your Outline
- Creating exportable outlines
- Script
- Contents sidebar
- Beats and scenes
- Work in any order
Get to know the Plot Board
The first port of call in your writing journey is the Plot Board. This is Arc Studio’s native digital whiteboard where you can organize your ideas and build your story.
We’ll start with an overview of what you can accomplish with the Plot Board, and then get into how you can start setting one up for yourself. (Feel free to skip ahead to the nitty-gritty details.)

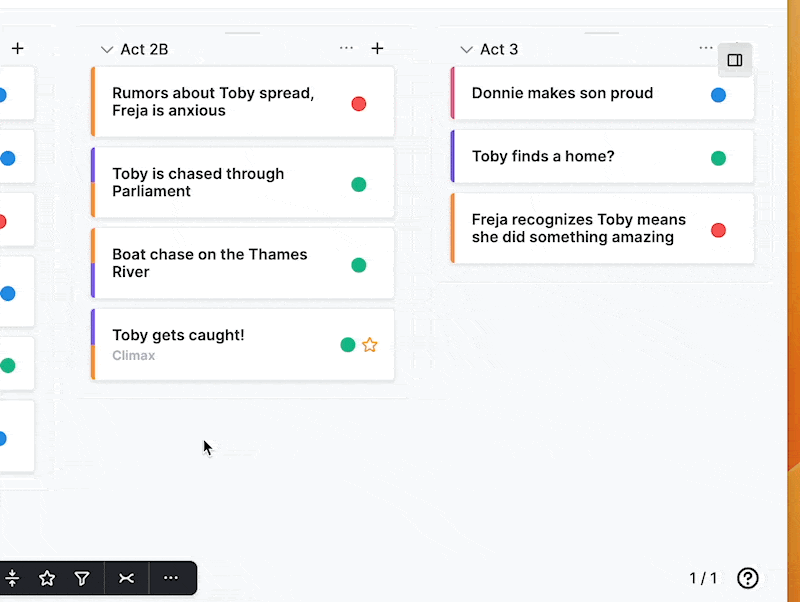
Above is what the Plot Board looks like while you’re breaking your story. The columns represent the acts of your script, and the boxes (or ‘index cards’ if you’re feeling nostalgic for your cork board) are the individual story beats. Each beat has a title, and if you expand the beat you can add a description of what happens in that beat.
You’ll notice the Plot Board is colorful. It’s pretty to look at, and it gives you a color-coded overview of your story. The vertical color bars on the left of the beats represent the storylines you’ve tagged that beat with, and the circles show which characters you’ve tagged the beat with. You can also tag each beat with their locations.
We call the storylines, characters, and locations in your script Story Elements. You can easily create them in your Story Elements sidebar and add details that you want to keep track of. You’ll have access to all that info when you’re writing your script, and the characters and locations you add will be in the autocompleter.
On the Plot Board you can use the filter tool (as shown in the GIF below) to highlight beats that contain specific story elements. For instance, you could highlight all the beats tagged with your A Story, all the beats tagged with your protagonist, all the beats tagged with their workplace, or any combination of the above. You can also highlight pivotal moments in your script that you’ve marked as key beats.


What about when you decide that none of this is working or you get a Studio note that blows the whole damned thing up? Don’t fret, you can easily add and delete beats, and drag and drop your beats around the Plot Board to rearrange the structure and find a new way forward.
You’re bound to have beats that you want to move around the Plot Board together. Instead of having to move them one by one, you can link them together into a sequence and move them as a group.

Just because you know a beat no longer works in its current location doesn’t mean you’ve figured out where to move it to. Or maybe you just thought of an entirely new beat but don’t know where it’s going to end up. This is where the Beat Inbox comes in handy. It’s a place to temporarily park your beats or create new ones that don’t yet have a home. You can drag beats into it and out of it, or make a new one directly inside.

Before we move on, let’s highlight a few more features. You can add and reply to comments on the beats, add images to the beats, and jump directly from a beat to the corresponding section of the script.
Get to know the Outline view
The Plot Board is great for building your story, but there comes a time in the writing process when you start dreaming about beats chasing you around a bizarro hybrid of the Plot Board and your elementary school and you need to see the story laid out in document form. Maybe you’ve finished building your story structure, or perhaps you just want to see what you’ve come up with so far. This is when you can use the Outline view.
The Outline view lays out all your beats so you can read them left-to-right, top-to-bottom just as your English-language brain likes it. You can revise your story here by editing your beats, adding beats if you think of something new, deleting beats, or rearranging them like in the Plot Board. Since everything is linked, your Plot Board will adjust accordingly.

How the Plot Board and Outline help you write your script
Enough preamble, it’s time to write your script and reap the words of all the groundwork you’ve laid breaking breaking the story. When you return to your Script view, you’ll find all your beats laid out on the page as prompts. There’s no need to switch back-and-forth between the Script and the Plot Board.
Click on the prompt, and the autocompleter will suggest the location(s) you tagged that beat with. Start writing your scene heading and you’re on your way!

But what about all that other information in your beats? The descriptions you wrote, the characters and storylines you tagged them with? It’s all right here in the Contents sidebar. You can see the beat title, the description, and the characters and storylines in that beat. You can also access the information about the characters and storylines you wrote when you created the Story Elements.

Everything you need to write your script is easily at hand!
How to use the Plot Board
Now that we’ve seen what you can do, let’s take a look at how you can do it. We’ll start with a closer look at the Plot Board, and then get into how you can start one yourself.
To recap, the columns are the acts, the boxes are the beats, and written in gray are the beat’s structure roles. (The function of that beat in your story.)

In the tool bar at the top you can:
- Go to your desk
- Search through your project.
- Go to Script view
- Go to your Plot Board
- Go to your Outline
- Manage your collaborators
- Export your outline
- Manage your settings
In the palette bar at the bottom you can:
- Add an act to the Plot Board
- Open all your beats
- Close all your beats
- Highlight key beats
- Filter the beats to highlight the ones containing specific Story Elements
- View your Story Arcs
- Create a beat template of your own

In the left sidebar you can access your:
- Contents sidebar, including the
- The Comments
In the right sidebar you can access your:
- Story Elements, including your
Starting a Plot Board
Navigate to your Plot Board by clicking the ‘Board’ at the top of your screen under the title or with the keyboard shortcut ‘Option + Cmd + B’ (PC: ‘Alt+Ctrl+B’)

When you open the Plot Board in an empty script, you can choose between:
- Adding your first beat to an empty Plot Board yourself or
- Prepopulating your board with a beat template, such as “5-act TV” or “Syd Field’s Paradigm.” You can also create a custom template for yourself to match your show’s act structure or story structure.
Acts and beats
But maybe you’re not the “template” type. You’re a rebel. You march to the beat of your own drum. You once thought about getting a motorcycle! (But where would you put the groceries?)
Let’s explore building our own structure. Clicking “Add first beat” will give you a Plot Board with one act (’New act’) containing one beat (’Untitled beat’).
- Click on the name of the act to change it.
- Hit ‘Tab’ to title the beat
- Hit ‘Tab’ again to write the beat’s description. (You can also click directly on the beat title and the description box)
- Collapse the beat by clicking the down arrow to the right of the beat’s title. (Click on the beat again to expand it.)
Adding and removing beats
- Add a new beat to the bottom of the act by clicking the ‘+’ next to the act name.
- Add a new beat directly below the current beat by clicking ‘+ Add beat’, or with the keyboard shortcut ‘Shift + Return/Enter’.
- Remove a beat by right-clicking on it and selecting ‘Remove script section’ (which removes the beat and the corresponding script section) or ‘Remove beat, keep script section.’’
Adding acts and removing act breaks
- Add a new act by clicking ‘+ Add act’ in the palette bar at the borrom
- When you have multiple acts, you can remove the act break by right-clicking on the first beat in the act and selecting ‘Remove act break,’ or by clicking on the ‘…’ next to the act name. All the beats in that act will move to the bottom of the preceding act.
Beat features
Now that you have some beats on the board, let’s explore some advanced beat features. Along the bottom of the beat you’ll find a row of icons:

- Jump to the section of your script that’s linked to this beat
- Add comments to the beat
- Add images to the beat
- Mark this as a key beat
- Tag the beat with Story Elements
Right-clicking on the beat or clicking the more options ‘…’ icon lets you:
- Move the beat to the Beat Inbox
- Remove the beat
- Add a structure role to the beat (like the pre-populated structure roles in the templates)
- Remove the act break, if it’s the first beat in the act
- Make this beat the beginning of a sequence
Story Elements
Your script isn’t just a list of plot points. It’s comprised of, among other things, your characters, the relationships between them, the places where they interact in your script’s world, the storylines that show their changes, and the uncountable hours of your life you’ve put into this thing.
It’s a lot to keep track of, so to support your sanity Arc Studio lets you color code your beats according to the characters and storylines they include. You can also assign a location to each beat.
Creating Story Elements
We can start creating Story Elements by pinning open the right sidebar and clicking ‘Elements.’ The Elements sidebar shows all the storylines, characters, and locations you’ve created. Of course, if you’re starting from scratch there won’t be anything there yet.
Add a new element by clicking the ‘+’ for whichever element type you like.
If you’ve already written part or all of your script, you can add the characters and locations (scene headings) from your script to the Story Elements by clicking ‘Import from script’ and selecting the desired Story Element.

Storylines
Once you’ve clicked ‘+’ to add your first Storyline, you’ll notice it looks similar to a beat. Adding the title and description works the same way. You can title your stories the generic “A Story,” “B Story” and “C Story/Runner” or make them more specific.
Like the beats, you can also add reference images to the storylines. Are you writing a horror film? Throw something gruesome in there for inspiration. Are you writing a political drama? Throw something gruesome in there for inspiration.
Each storyline you create is automatically assigned a corresponding color, shown in the bottom right corner. To change it, click the color circle and select another color. Later we’ll go over how to tag beats with these colors.
Characters
When you add your first character, you’ll see it’s similar to the storylines with a few added features:
- You can click ‘Import from script’ to add a character who already has dialogue in your script.
- Click on the circle next to the name to choose a picture from your computer for this character. If you’re in production, you can choose a photo of the actual actor. If not, you can choose an archetypical actor or anyone else. (Tip: Using a headshot works best.)
- You can click on the more options icon ‘…’ and select ‘Add script name’ to create the name that will show up in the script autocompleter. For instance, you may name the character ‘Walter White’ when creating the Story Element, but in the script you want him to be ‘Walter.’
- You can add extra images to the character element in addition to the icon photo
- You can also assign a gender to this character
Locations
You can specify whether a location is an Interior or Exterior. When you’re writing the scene for a beat in your script tagged with this location, the autocompleter will suggest the location for the scene heading (eg ”INT. WHITE HOUSE”).

Tagging and untagging beats with Story Elements
Now that you’ve created your Story Elements, let’s start tagging beats with them.
- Click the hashtag icon ‘#’ on the beat or select the beat and type # (’Shift + 3’ in the US) to open the Story Elements pop-up window.
- You can select the Story Element by using the search bar at the top or
- You can use the down arrow ↓ to move to the element you want to tag
- Use the right arrow → to tag the beat with that element. Use the right arrow → again to untag the element
- You can also tag the currently selected element and close the window by hitting ‘Return’
- To close the window without tagging anything, click away or hit ‘Esc’

The beat is now tagged with the Story Elements you’ve selected. The color bar on the left shows which storylines are tagged, and the color circles show the characters. (You can tag each beat with multiple storylines, characters and locations.)
This lets you see which storylines and characters are appearing in each section of your script. Is one of the storylines not being properly serviced in each act? Does the pacing feel wrong? Does it turn out that supporting character you were super stoked about is only in one scene? Cut ‘em!
Filtering your beats
When your beats have been tagged with Story Elements, you can use the filter tool to highlight that specific element.
- Click the filter icon in the palette bar at the bottom of the window.
- Using the same process as tagging, select whichever elements you want to highlight
- Click “Clear filters’ to deselect all the elements.

This allows you to zoom in on specific storylines, characters and locations to get a crystal clear view of where they are in your story.
Highlighting key beats
Similar to filtering your beats, you can click ‘Highlight key beats’ to highlight all the pivotal beats you’ve marked by clicking the star icon. These could be your big action set pieces, your protagonist’s key turning points or anything else you want to keep an eye on.

Sequences
To link your beats together, add a sequence marker by right-clicking on the first beat you want to include in the sequence and selecting ‘Make beginning of sequence.’ All the beats from this beat until the end of the act are now linked together in a sequence. Click on ‘New sequence’ to rename it.
You can move this entire sequence by clicking the three horizontal bars to the left of the sequence name and dragging and dropping it to a new location.
If you want to end the sequence, right-click on the first beat after your sequence and select ‘Make beginning of a sequence.’ This will separate the sequence above from the beats below.
You can also drag beats out of the sequence to another spot on your Plot Board, drag beats into the sequence, and change their order in the sequence.
To remove a sequence marker, thereby disconnecting the beats, right-click on the first beat in the sequence and select ‘Remove sequence’

Beat Inbox
Earlier we went over the benefits of the Beat Inbox. Access the Beat Inbox by pinning open the left sidebar, selecting ‘Contents’, and clicking the Beat Inbox icon.
You can create a new beat directly in the inbox by clicking the ‘+’ icon. These beats work the exact same as the beats in your Plot Board.
You can also drag beats from your Plot Board and drop then in the open Beat Inbox, or drag them out of the inbox to wherever you want them in your Plot Board.

Arc view
For all of you visual learners, Arc View is a great way to get a handle on your story’s dramatic structure. Start by clicking the ‘Arc view’ icon in the palette bar at the bottom of the screen.

Here you’ll see all your beats laid out in chronological order. The beats you’ve titled will be labelled accordingly.
When you double-click on a beat marker a window pops up allowing you to select a storyline associated with that beat. After you choose a storyline, an indicator dot of that color appears. If you select that same storyline from another beat marker, a line connects the two dots.
You can drag the indicator dots up and down to get a graphical representation of the highs and lows of your story. Is your character riding high because the beat is ‘She wins the lottery’? Drag that sucker up. Is she feeling blue because ‘She lost the ticket’? Drag that beat down.
But it doesn’t have to be your protagonist’s emotional state. You can chart any value that you like. If your character is saving up to buy a house, you could use the arcs to track their savings as they earn and lose money. Maybe the savings arc mirrors her emotional state until the end of the film, when she realizes she doesn’t need to afford a house in Los Angeles to be happy.
Outline
Let’s move on and see how use the Outline view. Navigate to it by clicking ‘Outline’ in the tool bar underneath the title. When it opens you’ll see all your acts, beats, and sequences laid out in order, complete with your beat descriptions and the color codes for your characters and storylines.
The Outline is great for two main uses:
- Reviewing and editing your story
- Creating exportable outlines
Reviewing and editing your Outline
All the information in the Outline is editable and linked to the Plot Board. If you change the name of an act, beat or sequence, the name also changes on the Plot Board. If you edit the description of a beat, the description changes on the Plot Board.
You can also move beats around the Outline by clicking on the color bar to the left of the beat and dragging and dropping them to their new locations. The beats will move in your Plot Board accordingly.
Did you think of something new while reading your Outline? Add a new beat directly below the currently selected beat by clicking ‘+ Add beat’ or with the keyboard shortcut ‘Shift + Return/Enter.’ This new beat also exists in the corresponding location of your Plot Board.
Beats can also be tagged and untagged with Story Elements using the ‘#’ pop-up menu, just like in the Plot Board.
Creating exportable outlines
You can use the Outline view not just for breaking your story, but also as a tool to make exportable outlines. In Outline view, click the export icon in the tool-bar.
Select either the ‘PDF’ or ‘Fountain/text’ option for your file
Choose the elements that you want to include in the ‘Export document’ pop-up window by clicking the box to the left of the element name. For more detailed options click ‘^’ to expand that section.

Script
Finally, let’s take a look at how we can use all the above work to help you write your script.
Return to the Script view by clicking ‘Script’ in the top bar underneath the title, and you’ll find your page filled with prompts for each beat you’ve created. In the margin to the left of each beat title you’ll find its corresponding beat marker.
Click on the beat title in the script and start writing that scene by adding the scene heading. If you’ve already tagged the beat with a location Story Element, the autocompleter will present it as an option.
Contents sidebar
The Contents sidebar to the left of your script gives you access to all the information from your Plot Board without having to switch back and forth to it. This keeps you in your writing flow.
You can see your entire story structure (acts, sequences, and beats) and access all the details you’ve added to the beats. Click on the beat marker in the script, or double-click directly on the beat title in the sidebar, and you’ll find the beat description and the tagged storylines and characters. You can also expand the storylines, characters, and locations to see your notes about them.
You can choose to have the sidebar show all your scenes instead of the beats, or you can have it show the beats with a preview of the scene heading. You can also access your Beat Inbox by clicking the icon at the top of the sidebar.

Beats and scenes
Let’s take a look at some of the ways you can work with your beats and scenes.
Connecting an existing beat to a scene
To connect a scene to a beat that you’ve already created, drag and drop the beat from the Navigation sidebar onto any paragraph in that scene. You can drag and drop beats from the Beat Inbox as well.
Connecting multiple existing beats to a scene
To connect multiple beats to a scene, drag the first beat from the Navigation sidebar and drop it onto the scene heading. This will be the main beat. You can then drag and drop the other beats onto the appropriate paragraphs of the scene. These minor beats will be slotted below the main beat in the Navigation sidebar.
Creating a new beat for a scene
To create a new beat for a scene, right-click on any paragraph in the scene and select ‘Add beat’ or use the keyboard shortcut ‘Cmd + Shift + B.’ You’ll see this new beat in the Navigation sidebar.
If you’re creating multiple new beats for a scene, the beat connected to the scene heading will be the main beat. The other minor beats will be slotted below that beat.
Just like you can have multiple beats in one scene, you can have multiple scenes in one beat. After you’ve linked the first scene to the beat, all the other scenes you write between that scene and the next beat will be included in the beat.
Disconnecting a beat from a scene
To disconnect a beat from a scene, right-click on the beat marker in the left margin and select ‘Disconnect beat.’ This will move that beat into the Beat Inbox. You can also right-click on the beat in the Navigation sidebar and select ‘Disconnect and move to inbox.’
Work in any order
This is only a suggested writing progression. Not everyone breaks their story in detail before starting on the script. With Arc Studio you can move between the Script view, Plot Board, and Outline view in any direction you want. Perhaps you only put a few beats down in the Plot Board, and then add more beats and fill in the details as you write your script.
Or maybe you already wrote an entire draft of the script (perhaps with a competing program), but now you want to change its structure. You’re starting with a full script and an empty Plot Board, but this is no problem. Once the script is imported into Arc Studio, add all your beats in the Script view. Then switch to the Plot Board where you’ll find them waiting to be structured any way you like.